Backups
Create backups of your volumes to protect your data.
Backups are used for long-term storage and recovery.
With an agent (MCP)
Connect the redu MCP, then just ask your agent. The agent can list_backups, create_backup, restore_backup, and delete_backup.
You can create or restore a backup by volume or by instance: pass a volumeId, or pass an instanceId and redu resolves that instance’s data volume for you (so a backup-focused key does not need volume-list access). restore_backup restores into an existing volume (volumeId), an instance’s volume (instanceId), or a brand-new volume (volumeName). The console steps below do the same thing.
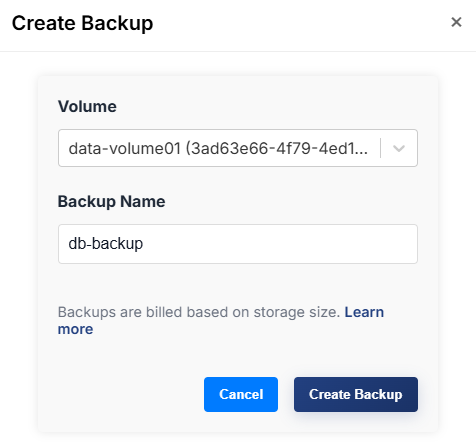
1. Create a backup
Go to:
Menu → Compute → Virtual Machines → Backups
Then:
- Click Create Backup
- Select a volume
- Enter a backup name
- Submit the form
Notes
- If the volume is attached, you may be prompted to stop the instance for consistency
- Boot volumes cannot be backed up, use Snapshots instead
2. View backups
Backups appear in a list with:
- Name
- Volume
- Size
- Status
- Creation date
Status values
creating, backup in progressavailable, backup is readydeleting, backup is being removederror, operation failed
3. Delete a backup
To delete a backup:
- Open the actions menu for the backup
- Click Delete Backup
- Confirm the action
Deletion is permanent.
When to use backups
- Protect important data
- Keep long-term copies
- Prepare for recovery scenarios
Tips
- Use clear naming, for example:
app-prod-weekly-20260401- Remove unused backups to reduce storage usage
Troubleshooting
Cannot create backup
- Check that the volume is valid
- Ensure sufficient storage and quota
Backup stuck in creating
- Wait a few minutes
- Refresh the page
- Retry if necessary
Boot volume error
Use Snapshots instead.