Compute
Launch and manage virtual machine instances.
This guide walks you through creating an instance and connecting to it.
With an agent (MCP)
Connect the redu MCP, then just ask your agent. It runs plan_instance to resolve the image, flavor, and network for you (no opaque IDs to supply), then create_instance to launch the VM and get_ssh_command to hand you the SSH command. From there it can manage the instance with instance_action (start, stop, reboot), get_instance_logs, and delete_instance, and browse with list_instances, list_flavors, and list_images.
Create a medium Ubuntu instance called web-01 with my default keypair on the first available network, and give me the SSH command.1. Create an instance
Go to:
Menu → Compute → Virtual Machines → Create Instance
Basic settings
Choose a meaningful name.
Example:
app-web-01
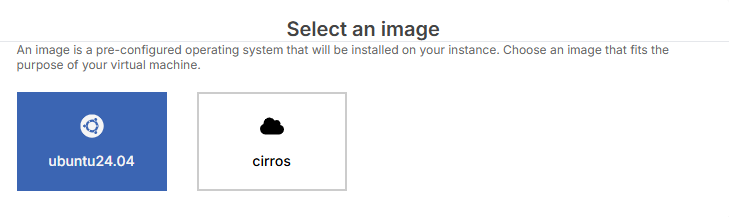
Image
Select an operating system image.
Example: Ubuntu
Flavor
Choose the instance size (CPU, RAM, disk).
Examples:
m1.mediumm1.largem1.xlarge
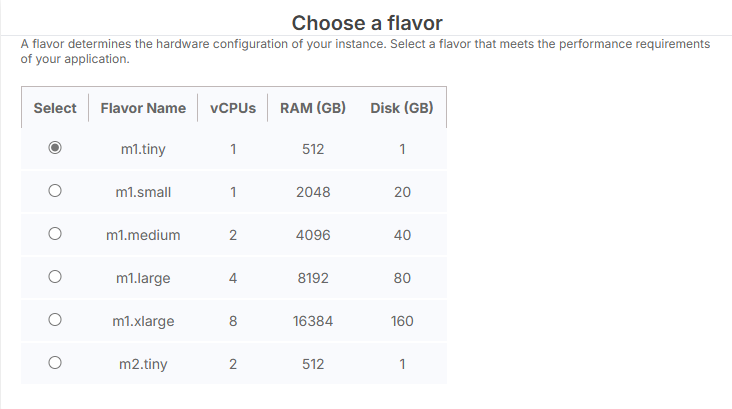
Note:
Some images require specific flavors. If the launch button is disabled, try a different flavor.
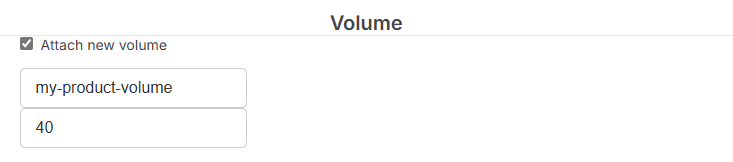
Storage (optional)
Enable Attach new volume to create persistent storage.
- Set size in GB
- Optionally name the volume
See Storage
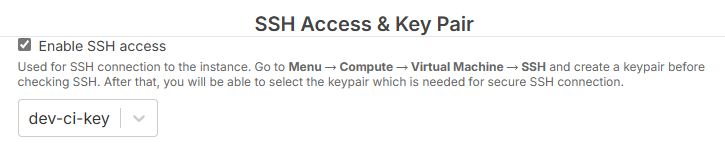
SSH access
Enable SSH to connect to your instance.
- Select an existing keypair
- Or create one → Keypairs
Requirements:
- A keypair must be selected
- Security group must allow SSH (port
22)
Security groups
Control network access (firewall rules).
Examples:
- SSH → port
22 - Web → ports
80/443
See Security Groups

Network
Select a private network.
A default network is created automatically.
See Networking

Domain
Leave the domain field empty to get an auto-generated .redu.cloud address, or click ⟳ Generate to pick one. You can add multiple DNS entries, each one creates a separate public endpoint on a different port.
Custom domains:
To use your own domain (e.g. app.yourcompany.com), you must verify ownership first. Go to Account → Domains, add your domain, and follow the TXT record verification steps. Once verified, type your domain in the DNS entry field, it will show a green badge confirming ownership.
See Custom Domains for the full verification guide.
Configuration script (optional)
Run setup commands on first boot.
Example:
#cloud-config
packages:
  - nginx
runcmd:
  - systemctl enable --now nginx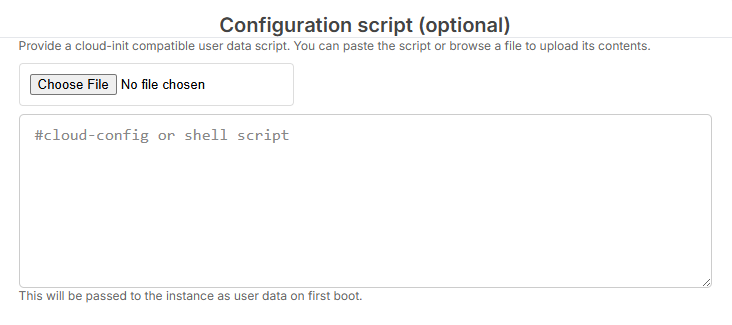
Launch
Review the summary and click Launch.
2. Manage instances
Go to:
Menu → Compute → Virtual Machines → Instances
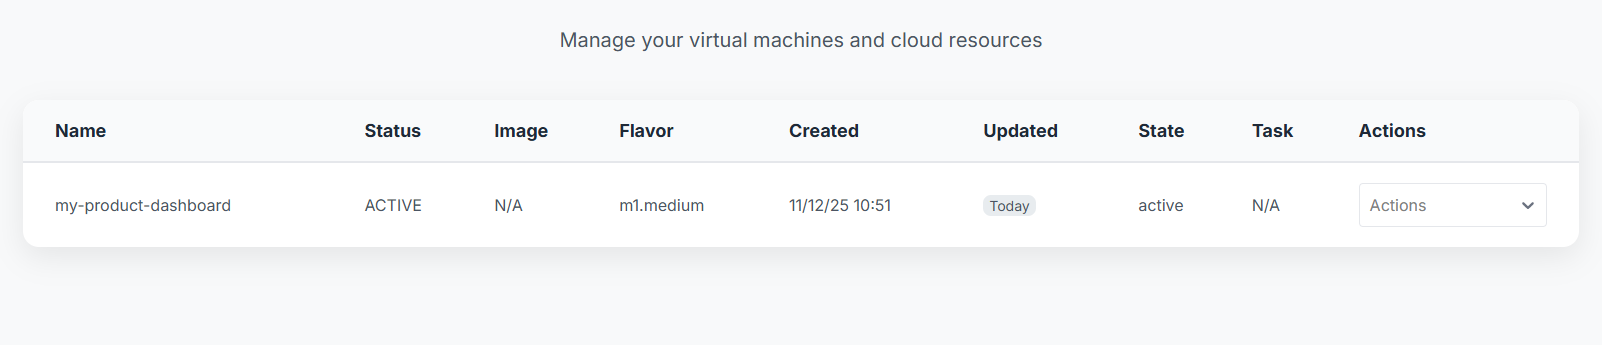
Available actions:
- Manage DNS
- Delete instance
3. Connect via SSH
If SSH is enabled and a keypair is selected:
ssh -p <port> ubuntu@<host>You can copy the command directly from the UI.
Troubleshooting
Launch button disabled
- Missing required fields
- Unsupported image/flavor combination
SSH not working
- A keypair must be selected
- Security group must allow port
22
Network missing
Create one in Networking